It has been so long since I've posted on my blog. The reason is I have been in mourning. I have lost a bunch of my hair!!! It all started in March of 2011. I started using a product I later raved about and now will warn you about.
I started using John Freida's Go Blonder gradual lightening spray in March. I used it 2-3 times per week on my roots mainly around my face. It worked! I didn't have to touch up my roots at all for 5 months! I was so excited that I posted a glowing review on my blog and told countless people how they too could save a bundle on hair colouring. In August it was time for colour. The spray did a good job of blending my roots and bought me a lot of time between salon visits, but it was time to freshen up my colour. I got my hair coloured the same way I have for many years (same product, same technique, same stylist). After the colour was washed out the damage was immediately noticeable. About 2 inches from the roots all around my face, my hair was completely fried. When combing it wet those areas sprung right up into a frizzy disaster. It felt spongey and gross. One I dried my hair it was dry and frizzy. Over the next few weeks my hair broke off and I was left with WAY too short bangs and frazzled ends :-(. I have been wearing my lulu lemon headband everyday for months to hide the mess. Now the shorter hair is too long to hide in the headband, but still too short to wear as bangs, so I'm in such an awkward stage. I have been dealing with this mess for months and hope this post will prevent any if you from having to go through it. I did look online after this happened to me and found a handful of other cases like mine.
I have been doing everything imaginable to try to condition and fix my mess of a mane, which has introduced me to some great new products and other hair stuff I am excited to share! I will have a few hair posts to put up soon!
In the meantime, stay far far away from the John Freida Blonding spray!!!
Be well.
Sarah xo
Thursday, December 1, 2011
Saturday, July 16, 2011
Makeup Quick Tips Series #2
1) Curl your lashes before putting on mascara. You can hit your lash curler quickly with your hair dryer, but be careful! Curl very close to the base of your lashes holding for 5 seconds, then move the curler half way up your lashes and hold for another 5 seconds.
2) Before wearing a matte lipstick give your lips a scrub. Matte lipsticks show every imperfection and dry skin on the lips-not pretty. Use a drop of olive oil and a pinch of sugar to rub over your lips. This will leave your lips in perfect condition for matte lipstick!
3) Try using a concealer or matte highlight powder 2 shades lighter than your skin down the centre of your nose. This will straighten your nose and make it appear thinner!
Wednesday, July 13, 2011
Please Tweeze!!!
This is my plea to get all women to pay closer attention to their eyebrows (or less attention in some cases!!). There are those "over tweezers" or the "brow pencil worshipers" and sadly there are women that don't do a thing to their brows! Please, please, please if you are the later, tweeze and trim please! Cleaning up your eyebrows can add dimension to your face, make your eyes look more open and increase your lid space!
I go to get mine threaded every 6 months or so and then maintain in between by tweezing and trimming. You can go to a salon or do it all yourself, either way something is most often better than nothing.
Here are some tips to brow shaping;
1. Use a baby teething gel to numb the skin before you tweeze. This is helpful if you are very sensitive to tweezing and/or if your going in for a major overhaul!
2. DO NOT use a magnifying mirror! This is probably opposite to what you would have assumed. Using a magnifying mirror increases the chance you will over tweeze. If you need 10x magnification to see the hair, then it's not noticeable.
3. Using the picture below as a guide, use a makeup brush, rat-tail comb or a pencil to determine where to start, arch and finish your brows. Rest your pencil beside your nose vertically up to your brow, that is where your brows should start. Tweeze between the eyes between those points to avoid the dreaded "uni-brow"!
Next, from the same position tilt the pencil so that it runs through your pupil up to the brow. This should be the highest part of your brows (the arch). Tweeze any hair under that area to make it thinner and arched.
Finally tilt the pencil more to just inside the corner of your eye, this is where your brows should stop.
4. Trimming your brow hair is a step most often ignored. This is so important! Sometimes you can get a crazy unruly brow hair that wants to do it's own thing and can completely ruin your look. Comb your brow hairs straight up with a brow brush or clean mascara spoolie and trim the hairs with a pair of brow scissors. You will be amazed at your transformation!
![]()
I go to get mine threaded every 6 months or so and then maintain in between by tweezing and trimming. You can go to a salon or do it all yourself, either way something is most often better than nothing.
Here are some tips to brow shaping;
1. Use a baby teething gel to numb the skin before you tweeze. This is helpful if you are very sensitive to tweezing and/or if your going in for a major overhaul!
2. DO NOT use a magnifying mirror! This is probably opposite to what you would have assumed. Using a magnifying mirror increases the chance you will over tweeze. If you need 10x magnification to see the hair, then it's not noticeable.
3. Using the picture below as a guide, use a makeup brush, rat-tail comb or a pencil to determine where to start, arch and finish your brows. Rest your pencil beside your nose vertically up to your brow, that is where your brows should start. Tweeze between the eyes between those points to avoid the dreaded "uni-brow"!
Next, from the same position tilt the pencil so that it runs through your pupil up to the brow. This should be the highest part of your brows (the arch). Tweeze any hair under that area to make it thinner and arched.
Finally tilt the pencil more to just inside the corner of your eye, this is where your brows should stop.
4. Trimming your brow hair is a step most often ignored. This is so important! Sometimes you can get a crazy unruly brow hair that wants to do it's own thing and can completely ruin your look. Comb your brow hairs straight up with a brow brush or clean mascara spoolie and trim the hairs with a pair of brow scissors. You will be amazed at your transformation!
Good luck and please don't over tweeze, brow hair seem to grow in painfully slow. If you feel overwhelmed tackling your brows for the first time, go to a professional. Get them shaped and then all you have to do is maintain them with the odd tweeze and trim here and there.

Sunday, July 3, 2011
June Favourites!
Wow I can't believe it's that time again already! Favourites time! I love doing these posts. I take a look at all of my beauty products and see what I have been favouring over the last month. It is a great opportunity to reflect on what I've been enjoying or retire some products that are not working so well.
My Favourites:
![]() Bath & Body Works Signature Vanillas Triple Moisture Body Cream in Coconut Coco
Bath & Body Works Signature Vanillas Triple Moisture Body Cream in Coconut Coco
![]()
![]() Jergens Natural Glow Daily Moisturizer
Jergens Natural Glow Daily Moisturizer
I tried this product years ago but my legs did not like it. I ended up getting small bumps on my legs after using this moisturizer so I ended up giving it away at the time. I have been hearing people talk about this a lot lately and decided to give it another shot. I have used it about 5-7 times in the month of June and I am shocked at the amount it actually coloured my legs. I got the medium to dark formula as my skin is naturally a little darker. I could see how much it worked due to the fact I didn't rub it in as well as I should have. I didn't put too much care into blending it in as I thought that it would be such a gradual self tanner, but I was wrong, it didn't take long at all for my skin to start turning tan and glow! I now blend carefully and use it about twice per week.
![]()
Coastal Scents Silica Powder Spheres
This product is quite the find! It is a dupe for the Makeup Forever HD powder but for a fraction of the cost. I got this for $4.95US and it's going to last me a long time. A little goes a long way with this powder. Using too much can leave a white cast. This powder sets foundation beautifully and leaves your face with a soft focus appearance. I use it on it's own for the most part, but have also mixed it with my skin toned loose powder as well!
![]()
![]()
![]()
My Favourites:
 Bath & Body Works Signature Vanillas Triple Moisture Body Cream in Coconut Coco
I love the Triple Moisture Body Creams! They are fantastic at keeping my legs and feet soft and ready for summer sandals and shorts/skirts/dresses! The smell of this particular one is so yummy! Even my husband commented on this. I use it every night before bed and add a little extra on my heels as needed.

Maybelline FIT me! Liquid Foundation
I have this in shade 220 and it is a perfect match! I ran out of my Makeup Forever Mat Velvet + foundation and thought I would try this out until I can get out to Sephora. I am pleasantly surprised! This is a medium to full coverage and lasts all day, even on hot days. I tried a few different application methods but found using my traditional foundation brush gave me the best finish. I will definitely repurchase this foundation! I joined Maybelline online and was able to print off a $5 off coupon!

I tried this product years ago but my legs did not like it. I ended up getting small bumps on my legs after using this moisturizer so I ended up giving it away at the time. I have been hearing people talk about this a lot lately and decided to give it another shot. I have used it about 5-7 times in the month of June and I am shocked at the amount it actually coloured my legs. I got the medium to dark formula as my skin is naturally a little darker. I could see how much it worked due to the fact I didn't rub it in as well as I should have. I didn't put too much care into blending it in as I thought that it would be such a gradual self tanner, but I was wrong, it didn't take long at all for my skin to start turning tan and glow! I now blend carefully and use it about twice per week.

This product is quite the find! It is a dupe for the Makeup Forever HD powder but for a fraction of the cost. I got this for $4.95US and it's going to last me a long time. A little goes a long way with this powder. Using too much can leave a white cast. This powder sets foundation beautifully and leaves your face with a soft focus appearance. I use it on it's own for the most part, but have also mixed it with my skin toned loose powder as well!
LUSH "Buffy" Body Butter
Buffy is a large body butter bar that you use on wet skin in the shower. It has shea butters and cocoa to moisturize and it has ground rice, almonds and beans to exfoliate. There is no need for moisturizer following this treatment as Buffy leaves your skin soft and moisturized. The smell is incredible! I do find that it exfoliates well and is quite abrasive so I use this only 1-2 times per week. The other days I just used a moisturizing body wash, which leads me to my next favourite...


St. Ives Oatmeal & Shea Butter Moisturizing Body Wash
I could just smell this body wash all day long! It does exactly what it is supposed to do; washes well, moisturizes and smells fantastic! I use this with a large shower puff and it really lathers! It is very inexpensive--BONUS!!

Estee Lauder Artist's Eye Pencil in "Softsmudge Brown"
This has been my go-to pencil for the past month. I generally use a brown rather than a black liner in summer for an everyday look. This pencil glides on well, lasts well in the heat and stays put. I tightline with it everyday and it makes my lashes look fuller and yet it is a soft no makeup, makeup look!
Wednesday, June 29, 2011
Makeup Quick Tips Series #1
I've decided to do a series of blog posts sharing some basic makeup tips. These tips are simple but work wonderfully. After applying makeup on a friend and talking through the application I realized how many tips she was picking up, tips that I thought were common knowledge as I've done them for so long and/or they are just second nature to me. My friend made me realize that many people may not know or have tried some of my tips/methods so I thought I would share them. Maybe you know them already, maybe you do something similar, maybe you prefer other methods. I just hope you pick up one or two pointers in this series and comment on the post and share your tips....I would love to hear them!
TIPS/TRICKS
* If you are using a sponge to apply foundation, ALWAYS (not sometimes) dampen your sponge. This will blend the foundation much better and provide a beautiful finish especially with a little stippling action plus it won't absorb as much product as a dry sponge would!
* Use a liquid concealer (often in a tube with a doe foot applicator) to conceal under the eyes. Liquids, rather than cream pots or sticks are thinner and are less likely to settle into fine lines and appear cakey. Be sure to pick a warm toned concealer for under the eyes to neutralize the cool tones of the skin there (dark circles are from the blue veins underneath).
* When applying lip gloss over a lipstick colour be sure to stick to the centre of the lips. Concentrating the gloss in the centre will give the lips a plumper look. You will also want to avoid gloss all the way into the corners of the mouth as it can look like you're drooling! haha
More tips to come!
Monday, June 27, 2011
"Just Another Mani Monday!"
My girlfriend actually turned up her nose when I picked up this colour off the shelf while out shopping the other day. I think she prefers brighter bolder colours, but something drew me to this subtle rose-gold polish. I am so happy I gave it a chance! It is Orly's "Chantilly Peach" and I think it is going to be my new go-to summer neutral polish!
I was hoping to try Essie's "Topless and Barefoot" and claim that as my summer nude, but I can't find it anywhere :(
Here is "Chantilly Peach", isn't it pretty?!

The formula is opague after 2 coats and dries quickly to a very frosted finish. One other thing I really like about Orly polish is the rubber lid/handle, it feels nice and a good grip lessens the chance of slips and mistakes!
I was hoping to try Essie's "Topless and Barefoot" and claim that as my summer nude, but I can't find it anywhere :(
Here is "Chantilly Peach", isn't it pretty?!
The formula is opague after 2 coats and dries quickly to a very frosted finish. One other thing I really like about Orly polish is the rubber lid/handle, it feels nice and a good grip lessens the chance of slips and mistakes!
Wednesday, June 22, 2011
Review: Maybelline One by One Volume Express Mascara
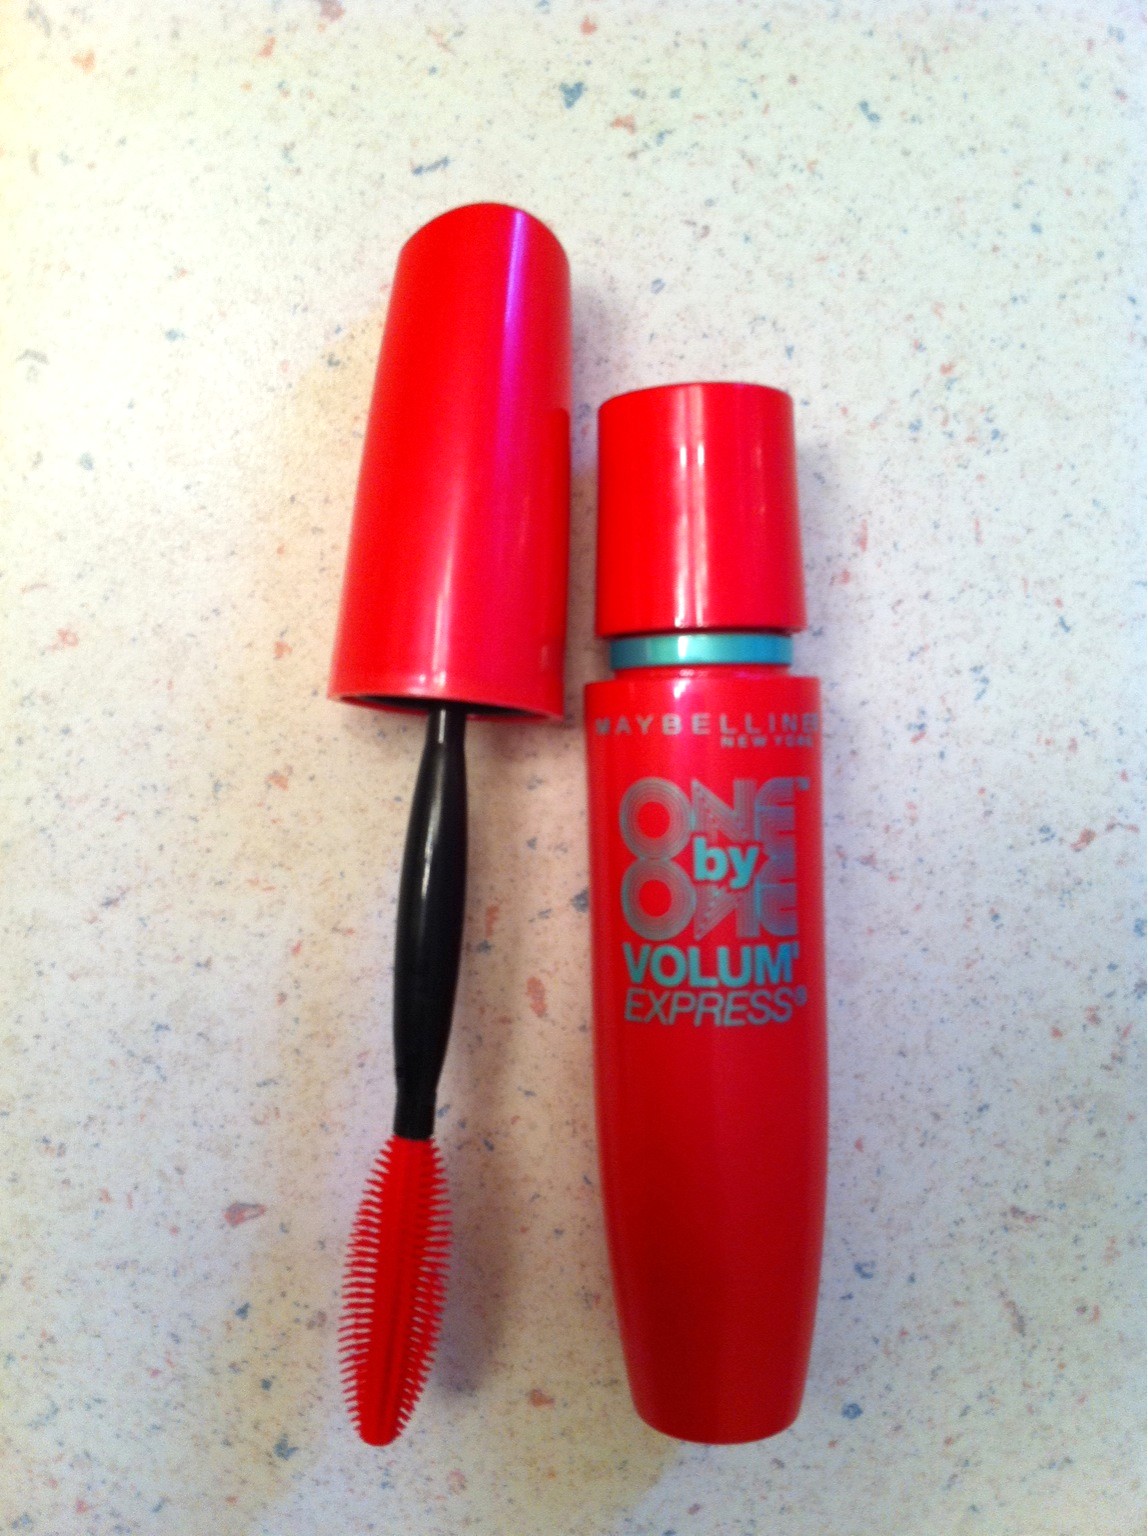 I've had my eye on this mascara for a while now but put off buying it because I have a few mascaras I really like on the go already. I finally caved when I found a $1.00 off coupon, it wasn't much but enough of an incentive to give it a try! I paid about $7.00 with the coupon.
 The applicator brush is plastic and very pliable. The formula does a decent job lengthening my lashes but doesn't add too much volume. The smell of the mascara is terrible, almost enough to make me stop using it :(
Overall, I wasn't overly impressed and I don't think I will repurchase this one once I use it up. As far as an everyday mascara, I will stick to my tried and true Covergirl Lash Blast Volume!

Tuesday, June 21, 2011
FOTD-Gaga Inspired
Today's photo of the day is of my daughter's hairstyle I created. I was inspired by Lady Gaga! It turned out well and looked so darn cute! We call it the Hair Hair Bow!


Sunday, June 19, 2011
Nail Polish Haul
I've been going a little crazy buying up all sorts of nail polish lately. I'm afraid it's turning into an obsession! Over the past month I have purchased 20+ new bottles! Today I am wearing "For Audrey" by China Glaze on my fingernails. It is beautiful! The colour is a slightly more greenish version of the infamous Tiffany's blue. On my toes I am wearing "Thataway" by China Glaze. I have an earlier Mani Monday post showcasing this colour on my fingernails, but I think it looks so much nicer on my tan toes! Here is a picture of the "For Audrey" I am wearing now and a picture of my latest purchases! Summer is so great for showing off your fun nail polish colours!


Wednesday, June 1, 2011
May Favourites - Sort of!
May was a light month for me as far as trying new things or favouring new things. I was gathering things to feature for this post and realized 3 of my May favourites are lip glosses from Coastal Scents and the other favourite is my BeautyBlender sponge. I decided that the BeautyBlender sponge deserves it's own review and perhaps I'll do a little tutorial with it as well in another post. I decided to focus on the 3 lip glosses that I absolutely love!
I ordered a number of things from Coastal Scents back in April and I have found that I have been using the lip glosses I ordered the most out of everything I bought. They are highly pigmented and the colours are fantastic! They are called Smacks!
The formula is really nice. They are not sticky like some glosses and they wear off well. When I say wear off well I mean they fade evenly. Some glosses I own wear off and leave lips patchy with colour. These glosses wear off nicely and leave my lips soft. Like all glosses they will need reapplying throughout the day.
Here are my favourite colours and swatches of them!
#1 Sheer Crimson- This looks quite dark on the swatch, but on my lips it's beautiful. It is about 2 shades darker than my lip colour.
#2 Coral Funk- This is the perfect Summer Coral! I love it!
#3 Flippin Hot- This is a very wearable, very hot pink. This is the only hot pink gloss I have found that I like.


Monday, May 30, 2011
Tag: 11 Most Reached For Products
Although this is a YouTube Tag I decided to do a blog post featuring my 11 most reached for beauty products. I was going to put these in order but found that too hard, so they are in no particular order.
1. Garnier Moisture Rescue Gel- My absolute fav moisturizer (see my April Favoutites for more on this)
2. Covergirl Lashblast Volume Mascara- I always go back to this one!
3. NYX Jumbo eyeshadow pencil in "Milk"- this makes eye shadows last and pop!
4. MAC Fix + - This sets makeup and gives a beautiful, natural finish
5. John Freida Go Blonder Gradual Lightening Spray- This is saving me a bundle on hair colour!
6. NARS blush in "Orgasm"- a staple makeup product and my favourite blush of all time!
7. MAC Cream Colour Base in "Hush"- I love this highlighter!
8. Olay Pro-X Cleansing System- a cheap alternative to the Clarisonic.
9. Nivea Milk & Honey Lipbalm- I use this every single day!
10. Makeup Forever Mat Velvet + Foundation- I love the coverage I get with this foundation.
11. BeautyBlender- These sponges are amazing for applying foundation! They give my skin an airbrushed look!
Wednesday, May 25, 2011
Hi-Tech Makeup
Before I buy beauty products I usually like to check my favourite review site to see how others rate it and view their comments. I try really hard not to buy based on packaging or fall prey to catchy phrases like "Inspired by..." or "Clinically proven" or "Reduces the appearance...". I rely heavily on my favourite site to research before I spend my hard earned money (or my Hubby's for that matter ;p). My favourite site is....drum roll...... MakeupAlley! If you haven't yet, check it out. You can find just about every beauty product here most with pictures, reviews, reviewer's comments and ratings. You can also swap on this site and keep a list of favourite products or products you want on your wishlist! I think I use this website 10-20 times per week!

Another hi-tech makeup favourite of mine is the Modiface Make App for iPhone. This app is a great way to test out different looks on your own face! You use a picture of yourself (or a model photo) and choose various shadow, blush and lip colours! It is very well done and the computer generated makeup application is very precise and realistic.
I hope you enjoy these hi-tech makeup tools as much as I do!
xo Sarah Stilettos
Monday, May 23, 2011
"Just Another Mani Monday!"

Monday, May 16, 2011
"Just another Mani Monday!"
 Today's manicure features "Thataway" by China Glaze. It is an orangey coral that is perfect for summer!
The formula is a little thin and somewhat streaky so it took 3 coats to get the nice solid finish I desired. I think the colour is fun and bright, but I think I would prefer it on my toe nails than on my finger nails. I just need my feet to be a little more tan as corals look beautiful next to tan skin.
Overall I love the colour but will keep my eye out for the same colour in another brand of polish due to the watery formula. Not all China Glaze polishes have this consistency, some are my absolute favs!
Sunday, May 8, 2011
Save a Bundle on Hair Colouring!!!!

Thursday, May 5, 2011
April Favourites!
I found some really great products last month and I'm excited to share my new favs! Please excuse my nail polish in some of the photos, I just put it on last night and it is definitely not a favourite. I think this polish will end up in my daughter's collection!
Garnier Moisture Rescue Gel
 I have been using this every day in April and it is definitely a favourite. I have already repurchased this even though I am not yet out of my first jar. I do not want to go one day without. For me, this is a dupe of Mac's Oil Control Lotion. It feels the same on my skin and the results are the same. The difference is in price, the Garnier Gel is only $8 at Walmart. YAY!
Origins VitaZing SPF 15 Energy-boosting Moisturizer
 So I know I just mentioned a moisturizer that I use everyday and this is a moisturizer too, but this is a completely different product for me. I use the Garnier moisturizer every day and night with the exception of the days that I do not wear foundation. Although the VitaZing it not marketed as a tinted moisturizer, it is. It looks like a white lotion with tiny brownish flecks in it. Those flecks are pigment particles and when you rub this all over your face it blends the pigment particles and creates a light coverage and beautiful glow. I use this when I do not use my foundation and for a girl that usually never leaves the house without foundation this is pretty amazing. I have never found a tinted moisturizer that gives me coverage I am confident with until now! This is a HG tinted moisturizer for me! I got this back in March and in April it quickly became a favourite. I have a friend that this product would be perfect for and I can't wait for her to try it!(LCM) Vitazing is pricey and a little tricky to find for Canadians. Some Bay stores in Toronto and Ottawa carry it and you can order it directly from Origins.com. I actually did some cross border shopping and got mine at Macy's for $35USD.
NYX Jumbo Eye Pencils
 I just love these pencils! You can wear them on their own as an eyeshadow or liner or you can use them as an eyeshadow base. I use them as a base. I love the way they add vibrancy to your shadows! I use them all over my lid then apply a shadow and boy oh boy, the colour pops! Depending on the colour of pencil I use you can change the undertones of any of your eyeshadows and you instantly have a whole new set of colours! These pencils are so creamy and really give your shadows something to stick to! They don't crease for me and they make my shadow last so long! At $4.49 each, you can't go wrong. I've always said, "You can never have to many NYX jumbo eye pencils in Milk" as it was my favourite colour (white) but lately I have been using so many different colours. For the month of April I seem to have favoured my "Cottage Cheese" pencil. It is a shimmery white.
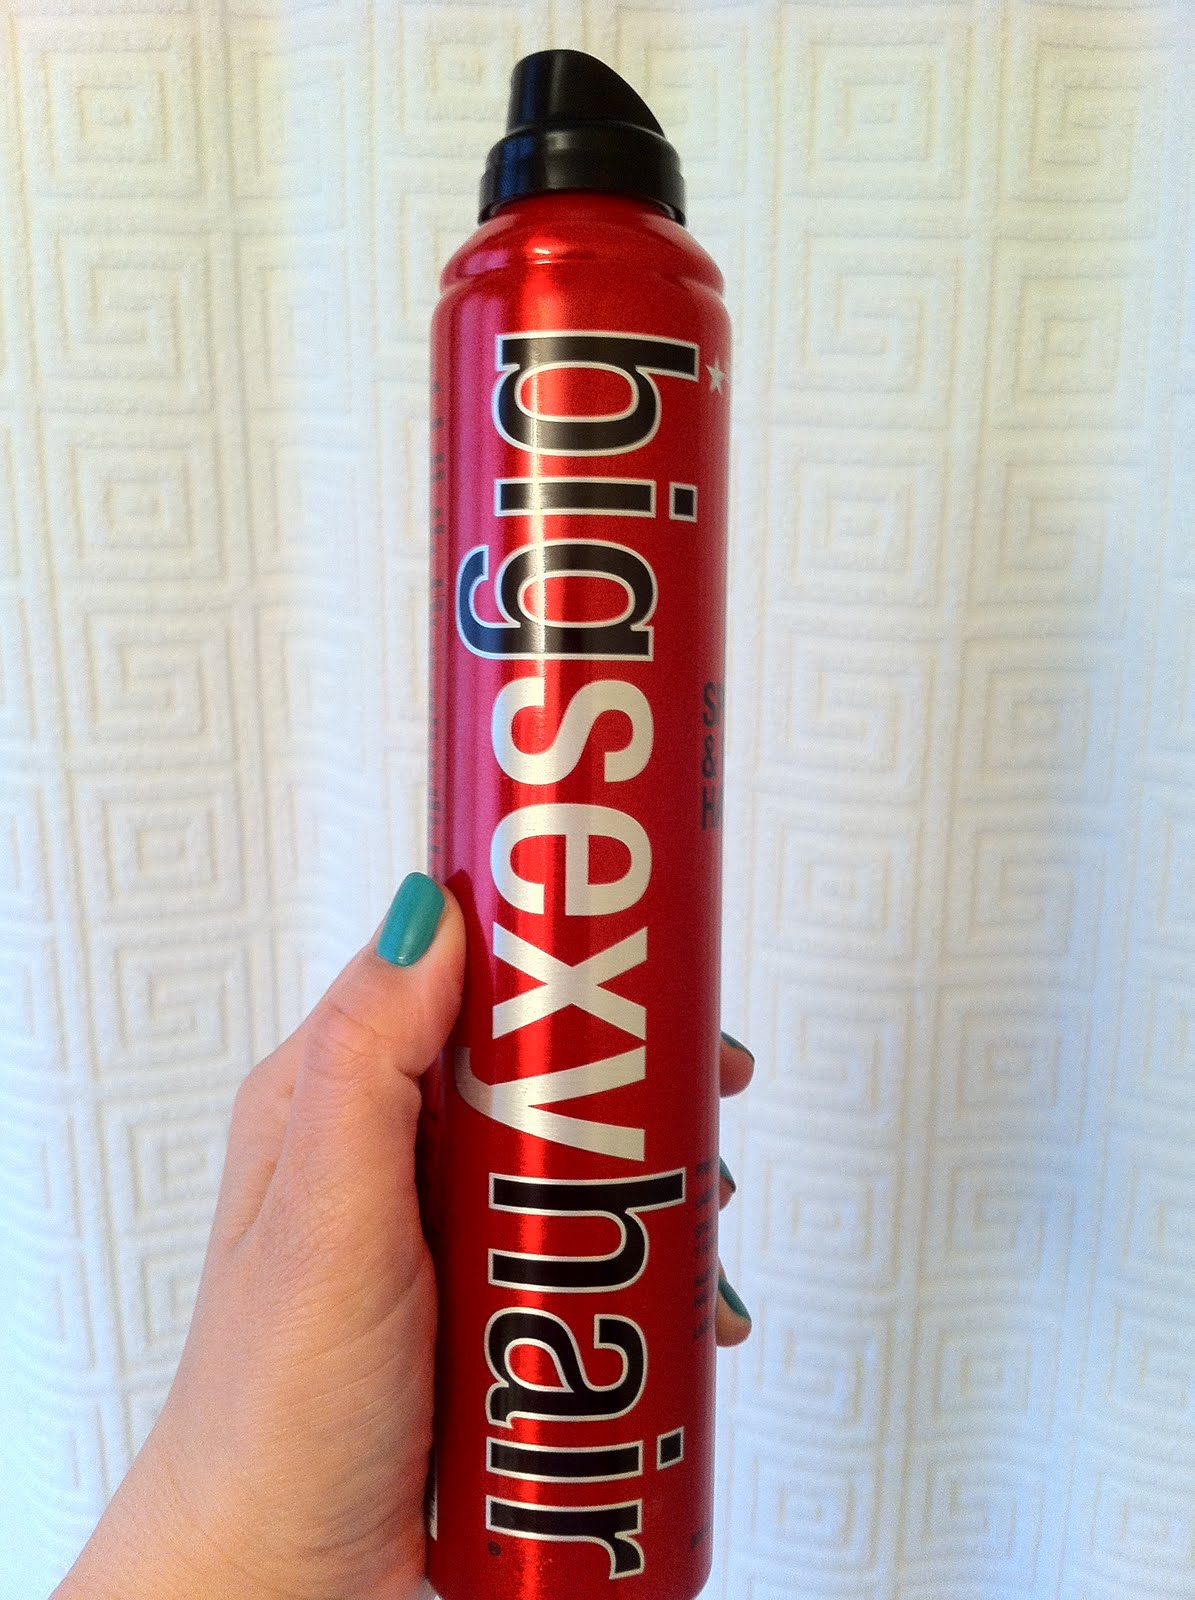
Big Sexy Hair Hairspray
 There is "Spray and Play" and "Spray and Play Harder". I have been using the "Spray and Play Harder". This is my absolute favourite hairspray. I only tend to use hairspray when I wear my hair curly/wavy. This hairspray is perfect for that! It holds my curls all day and yet it is flexible! I can't stand hairsprays that don't offer movement, and with a flowing curly look, that is so important! I've purchased this in the drugstore in the past, but last month I spotted it at Winners for only $12.99! It's a huge can and lasts forever!
This favourites post was so easy! I had so many great products to rave about for April. I probably could have picked a couple more, but I will see if I am still as excited about them over the next month and maybe include them in my next favourites post!
Let me know your favourites!
Sarah Stilettos xx
Garnier Moisture Rescue Gel

Origins VitaZing SPF 15 Energy-boosting Moisturizer

NYX Jumbo Eye Pencils

Big Sexy Hair Hairspray
This favourites post was so easy! I had so many great products to rave about for April. I probably could have picked a couple more, but I will see if I am still as excited about them over the next month and maybe include them in my next favourites post!
Let me know your favourites!
Sarah Stilettos xx
Thursday, April 28, 2011
Removing Makeup
It is so important to remove your makeup and too many people skip this step. I have oily acne-prone skin so this is a necessary step for me in trying to maintain control over my skin's condition. I have tried many different types of makeup removers and will review some here. You will find that the type of remover you prefer will depend on your lifestyle and your skin type.
I find that because eye makeup is the trickiest to remove I focused my efforts in finding the best removers for liners and mascara. Removing foundation, blush and shadow are far less effort and may only require your usual facial cleanser. Here are some reviews for eye makeup removers;
MAC Cleanse Off Oil

This is the priciest of the products reviewed. I used to use this all the time and it works wonderfully. I ran out and decided to find an alternative while I was at the drugstore rather than making the trip to MAC. I am glad I did. As well as this remover works it is pricey and for something I use everyday I realized that I could save quite a bit of money switching to another product. I found the best was to use this remover was to apply it directly to a cotton pad and hold it on my eyes for about 30 seconds, then wipe off the makeup. Con: this product (like many eye makeup removers) tends to get in your eyes and it causes your vision to blur temporarily.
Huggies Baby Wipes

I prefer the Shea Butter wipes most of all, they seem to work best and leave my skin soft. These are so cheap for the number of wipes you get and let's face it, it's so convenient to just grab a wipe! It is best to store the container upside down so that when you turn it over and remove a wipe it will be very saturated. I have tried no-name or store brand baby wipes and they just don't compare. The store brand wipes are thin and less saturated and take more effort to remove makeup.
Garnier Fresh Grape Water Makeup Remover

I purchased both the remover wipes and the liquid remover in this line. I didn't like either. I found that both formulas did not remove makeup very well at all and the wipes were not saturated enough. Even if the wipes were more moist I still don't think they would have done the job. I used 3 times as much liquid and about 3-4 wipes to remove all of my makeup. The wipes are more expensive than the baby wipes. I ended up giving a friend the wipes I had left and an unopened package. It wasn't even worth it to me to just use them up. I didn't want to put so much effort into the removal and I didn't like tugging on the skin around my eyes so much. The liquid remover will be going to my friend as well, if she even wants it, it works as well as the wipes.

Clean & Clear Soothing Eye Makeup Remover
I have used this remover again and again over the last 10 years. There is a reason I always come back to this one. This remover works! It removes all traces of my eye makeup quickly and completely! It is a very oily product, I don't have to use too much of it and it's relatively inexpensive. The only downside would be the blurry eyes, but that goes away quick enough!
Extra Virgin Olive Oil

Olive Oil gives you the biggest bang for your buck! Check out my last Blog post on Homemade Beauty. Olive oil has so many great uses for beauty and it is one of the best eye makeup removers. I used this on one eye and the MAC Cleanse Off Oil on the other eye and found no difference whatsoever (aside from price, that is)! Both eyes blurred a little, so that's the disadvantage to using an oil, but they really work well to melt away the makeup!
Vaseline

Good ol' Vaseline! Right now this is my favourite makeup remover! It works wonders at removing stubborn eye makeup and it leaves my eyes super moisturized! It, like the extra virgin olive oil, has so many other beauty functions! Vaseline is the cheapest of all removers mentioned and it is so easy to find.
I hope you enjoyed this post and discovered some new removers to try! Don't forget to always remove your makeup before bed, your skin will thank you for it!
Thursday, April 21, 2011
Homemade Beauty
The skin care industry is a multi-billion dollar business, estimated to be worth USD43 billion per year. There are always new products with new claims to get you the beautiful skin you've always dreamed of. You can spend a small fortune on lotions, potions, creams, toners, masks, scrubs, etc., etc., etc. I was getting tired of spending so much money only to find that some of these products would cause breakouts or just not really do much of anything for my skin. I decided that I would do some research and trials with some back to basic (and cheap!) products for my skin and hair. My wallet and my skin are thanking me-BIG TIME!
I have put together a list of beauty treatments you can try with things you can purchase at the grocery store or drugstore. There are so many natural and simple ingredients you can use in place of commercial beauty products, but I will just focus on my tried and true favourites. Please give them a try and see the fantastic results!
Lemon Juice
I mentioned lemon juice in my last favourites post. Lemons have natural antiseptic and astringent qualities as well as lightening effects on the skin. I use lemon juice with sugar on a cotton pad every 2nd or 3rd night as a very refreshing exfoliating scrub. I also use lemon juice on it's own all over my face and leave it for 15-20 minutes before rinsing to help tighten pores and to lighten some discolouration.
Sugar
I use sugar in a couple of different ways. I use sugar and an exfoliating scrub with lemon juice, as mentioned above, or with honey. When I use honey and sugar I can also scrub my lips and it works better than any lip scrub I've purchased. I don't like to use the lemon juice on my lips as it can be drying. I also add sugar to a bit of extra virgin olive oil for a more moisturizing scrub. This too can be used on the lips. You can use the sugar and honey combo to use as a body scrub as well of you can just use your favourite body wash and add a little sugar in the palm of your hand. WARNING!- sugar can be abrasive, always scrub gently in a circular motion.
Honey
LIQUID GOLD! This is probably my favourite beauty product from the pantry. I use it either on it's own or as a base for my masks. When I use honey my skin feels so soft, my skin looks so even and I have a really nice glow. I slap this all over my face and leave it on for about 15 minutes, then rinse it with warm water. Surprisingly it rinses away quickly and nicely (not what you'd expect from sticky honey). As mentioned you can add sugar to make a scrub and mask in one and use it as a lip scrub. I also use honey with oatmeal and with Aspirin for other types of masks! I will give some easy instructions and recipes below.
Extra Virgin Olive Oil (EVOO)
I love this stuff. I think I use it the most of everything I'm mentioning. It has so many great uses and it is so cost effective considering it's multiple uses. EVOO is very moisturizing. I use it on it's own as a moisturizer at night, sometimes I add a drop or two of glycerin when I need a heavy duty moisturizer. I use it with sugar as a face/lip scrub. I use it with a bit of dish soap to clean my makeup brushes (it takes and oil to get rid of other oils!). I use it as an eye makeup remover. I also use EVOO as a hair mask, saturating my hair for 15 minutes before shampooing. It repairs my dry ends and leaves my hair so soft! You can also use EVOO to soak your finger nails, it will moisturize the nails and cuticles and actually nourish your nails and make them stronger!
Yogurt
Yogurt is great for the skin, it is cooling and calms redness and puffiness. The lactic acid in yogurt acts as a natural exfoliant. Be sure you get the plain unsweetened yogurt. I use this on it own as a mask and I also add honey and oatmeal from time to time. I find if I have active breakouts, the yogurt calms them and reduces the size!
Oatmeal
It is worth the $15 coffee grinder you will need for this ingredient. Ground oatmeal can be added to honey or yogurt and applied to the skin as a mask and it will sooth dry itchy skin. It is also fantastic in the bath if you have dry-itchy skin. Be sure to use regular oats, not the instant kind.
Aspirin
Aspirin (ASA) is great for treating acne prone skin. Added to some honey of a bit of water, Aspirin can reduce redness and reduce blemish size. The acid exfoliates revealing soft skin. Be sure to use uncoated Aspirin and moisturize with EVOO afterward.
Glycerin
You can find Glycerin at the drugstore usually where the rubbing alcohol is sold. Glycerin is in almost all beauty products, especially moisturizers. On it's own it can actually dry out your skin, but added to 3 parts water or adding 1-2 drops to a teaspoon of olive oil it will leave your skin soft and smooth and without dry patches. If you have a favourite moisturizer already, you can add a few drops of glycerin when applying to make it an intense moisturizing night cream! One part glycerin and three parts water in a spray bottle will keep for about 2 weeks. This recipe can be used as an all over moisture spray and also as a mixing medium for mineral makeup!
So, as you can see there are so many wonderful and cheap grocery/drug store items to make you beautiful! The best results will be finding a balance that's right for your skin type and sticking to that routine! Let me know your homemade beauty secrets!
Recipes
I made these as easy as possible 1-3 ingredients only. I used to shy away from homemade beauty regimes because I believed it would be too much work, but with these simple recipes you'll save a bundle and find it so easy to have beautiful skin (and hair)!
Scrubs
Lip scrub- 1-2 drops of extra virgin olive oil or honey and a pinch of sugar
exfoliating face scrub- 1 tsp lemon juice and a pinch of sugar. Saturate a cotton pad with the juice then sprinkle on some sugar. Rub the cotton pad gently over face, avoiding eye area. Rinse (if you happen to lick your lips mmmmm lemonade!)
exfoliating and moisturizing face scrub- 1tsp olive oil or honey and a pinch of sugar
Masks
Yogurt Mask- 1/4 cup yogurt on it's own or add 1 Tbsp honey and 1 Tbsp oatmeal. Leave on for 15 minutes then rinse.
Aspirin Mask- 2 uncoated aspirin dissolved in 1 tsp water to create a paste (optional: add 1 tsp honey) Leave on for 15 minutes then scrub, then rinse.
Saturday, April 16, 2011
"All Drugstore" Smokey Eye!
 This shimmery and dramatic smokey eye was created using makeup purchased at the drugstore. You can be beautiful on a budget! It just so happened that I chose all Maybelline products, but you can substitute for any products you like. I love the eyeshadow quad I used in the video and I use it often. I did not however like the Maybelline Liquid Liner and I definitely will not be repurchasing. I found the formula way too thin. Here is a list of everything I used in the video:
Maybelline Stylish Smokes eyeshadow quad in "02- Natural Smokes"
Maybelline Liquid Eyeliner in "Black"
Maybelline Expert Eyes eyeliner pencil in "Velvet Black"
Maybelline Great Lash mascara in "Soft Black"
Mark. Cheek Tint in "Cheeky"
Quo In The Club/V.I.P Lip gloss in "Pink Stilettos"Tuesday, April 12, 2011
March Favourites
I love trying new products and the month of March was no exception. I have tried a number of new to me things and revisited some things that I used to use. I found a lot of great things, but like always I tried out a few not-so-great things too. I will let you know the winners and losers of the month!
Winner: Rimmel Soft Kohl Kajal Eyeliner in "White"
 Kohl (also called Kajal) is an ancient eye cosmetic. It was made by grinding galena (lead sulfide) and other ingredients. Today the trend is to make it without poisonous ingredients. It is widely used in the Middle East, North Africa, and South Asia to darken the eyelids and as mascara for the eyelashes.
Using a white liner on the water line (inner rim) makes your eyes appear larger and makes you look more awake! Some mornings you just need that extra something, and the Rimmel liner works perfectly. It lasts quite a while and does not irritate my eyes. For some reason March was not a great month for me in the sleep department so I relied on this product to disguise my utter exhaustion!
Winner: Lemon and Sugar
I am so happy this has been working for me! This is such a cheap and effective treatment!
Lemon juice contains one of the AHAs or Alpha Hydroxy Acids which is citric acid. It works by sloughing off dead skin, promoting skin elasticity, and enabling new skin cell growth rise from underneath. It also flushes out pores and keeps your skin feeling fresh and bright. Lemon juice has skin lightening properties as well which will help diminish age spots and acne scars.
 Every night after cleansing my face, I saturate a cotton pad with lemon juice and rub it all over my face (like a toner, avoiding the eye area). It does tingle a bit but it makes me think it's working really hard!! I let the juice soak into my skin and leave it for 10 minutes, then rinse thoroughly. Some people leave it on overnight with amazing results. I am gearing up to do that myself but I want to ease into it so I don't get any adverse reactions. Every other night or every third night, after soaking the cotton pad, I add about half of a teaspoon of granulated sugar and rub this all over my face. This is such a great exfoliant and my face just glows afterward!
Winner: Nivea Milk & Honey Lip balm
 After using a "loser" lip balm that I really wanted to love and clearly didn't, I went back to my Nivea Milk & Honey Lip Balm. The smell is incredible and the formula itself leaves my lips super soft! I keep this on my night stand and put it on just before bed. This lip balm is only $2, which excites me even more!
Loser: EOS Smooth Sphere Lip Balm
 Like I said, I really wanted to love this lip balm. The packaging was what lured me in, it is so cute! I have other sphere lip balms (like Ballmania) but they all require you to dip your finger into the product and I don't like that. The EOS sphere opens to reveal a dome shaped lip balm that you just rub directly onto your lips. The shape makes it so great for finding it in the bottom of your purse. Too bad the formula is absolute garbage :( I used this for a few weeks hoping it would start to work but it never did, in fact it left my lips dry and I found my self reapplying so often. At least I have my Nivea Milk & Honey!
Winner: Yonka Emulsion Pure
 This products deserves top spot for my March favourites! I have had this product for about a year and a half. For some reason I never got into a routine using this, and I don't know why. I always have great results and yet I forget it's in my arsenal. For the past month I have been using this and I will officially say I'm in a routine! This is a milky, magical potion. It is a blend of essential oils of thyme, lavender, cypress, rosemary, and geranium in their most concentrated form to render a pure and highly effective treatment for oily or problem/acne skin. The best way to use this product is use a compress; soak a piece of gauze and hold it on the problem area for 15 minutes. Do not rinse. If I feel a pimple coming on, even the big hormonal cystic ones, I will do this at night and in the morning I wake up so happy! The redness is gone and the inflammation is reduced to almost nothing. You can use the Emulsion Pure as an all over toner as well and the smell is incredible!
I hope you enjoyed this month's favoutires! Comment below with your favourites!
Winner: Rimmel Soft Kohl Kajal Eyeliner in "White"
Kohl (also called Kajal) is an ancient eye cosmetic. It was made by grinding galena (lead sulfide) and other ingredients. Today the trend is to make it without poisonous ingredients. It is widely used in the Middle East, North Africa, and South Asia to darken the eyelids and as mascara for the eyelashes. Kohl eyeliner has the softest powder texture and is available in dark matte shades. This product may come in several forms: pencil, pressed powder, or loose powder. It is usually applied to the inner rim of the eye (the pink area behind the eyelashes) unlike other eyeliners as it does not irritate the sensitive tissue
in that area.Winner: Lemon and Sugar
I am so happy this has been working for me! This is such a cheap and effective treatment!
Lemon juice contains one of the AHAs or Alpha Hydroxy Acids which is citric acid. It works by sloughing off dead skin, promoting skin elasticity, and enabling new skin cell growth rise from underneath. It also flushes out pores and keeps your skin feeling fresh and bright. Lemon juice has skin lightening properties as well which will help diminish age spots and acne scars.

Winner: Nivea Milk & Honey Lip balm

Loser: EOS Smooth Sphere Lip Balm

Winner: Yonka Emulsion Pure

I hope you enjoyed this month's favoutires! Comment below with your favourites!
Thursday, April 7, 2011
Flawless Foundation Routine
Watch the video below to see my foundation routine to achieve a flawless finish!
Products Used:
Garnier Skin Renew Anti-Dark Circle Roller in "Sheer Tint"
Monistat Chafing Relief Powder-Gel
Makeup Forever Matte Velvet + in "Vanilla"
Benefit Boi-ing Concealer in "02"
Benefit Eye Bright Pencil
MAC Select Moisturecover Concealer in "NW20"
Benefit Powderflage
* All products mentioned in this video were purchased by me
Monday, April 4, 2011
How to Contour, Highlight and Blush!
Whether you are looking to enhance your cheekbones or looking to create the illusion of defined cheekbones (that's me!), then follow these tricks of the trade! I will also show you how to disguise a large forehead -, slim your nose, and define your jaw line all with just a few products!
Contouring (Sculpting)
As you can see in the photo, I have indicated the main areas to contour but I will also explain a couple of other areas to sculpt that will further enhance your look!
You can contour with a powder, cream base, dark foundation, concealer stick or some bronzing powders as long as you follow these simple rules; the shade must be 4-6 shades darker than your skin tone and the formula must be matte! I am really liking the Coastal Scents Blush & Contour Palette.
 Take a contour brush or chisel brush and start applying the contour shade under your cheekbones. It should follow a line from the corner of your mouth to the top of your ear, however it should go over as far as your mouth, just under your pupil is perfect. Be sure to blend this right into the hairline to make this as natural as possible. Next, continue contouring at the temples and up the side of the forehead along the hairline. **If you have a large forehead continue the shade around the hairline at the top of the forehead creating a big "C" shape from the temples.
If you wish to thin your nose you can apply the contour shade to the sides of your nose. Blend very well! You can also shorten the appearance of your nose by applying it to the tip of your nose.
If you have a round face you may wish to define your jawline. Apply the shade on the jawline and just under the bones. You will want to avoid this step if you have a thin face or a very structured jawline as this can come off looking quite masculine to those face shapes.
Be sure to blend all of your contouring really well using circular motions with your brush.
Highlighting (shaping)
Highlighting will enhance your look by drawing the eyes to the higher planes of your face. You can also use techniques to straighten your nose. I absolutely love the Cream Colour Base in "Hush" by MAC. It has a beautiful shimmer that catches the light and is so gorgeous! You will also need a matte highlighter if you want to do a complete sculpt and shape. In the photo I have marked the areas to highlight with a shimmery highlighter. I will explain where you can apply the matte highlighter to fully shape your face.
 Start highlighting by taking your shade right on top of your cheekbones from under the pupils to the outer corners of the eyes. This area is particularly flattering when the light catches the subtle shimmer. Take a small amount and run it down the centre of your nose. This will make your nose appear straighter and slimmer. You can use this as a brow highlight too! Those are the only places you want to apply a shimmery highlighter. For the next few places you will need a matte highlighter. The one in the Coastal Scents Palette is great for this too. Take this product on a fluffy brush and apply it to the centre of your forehead, on your cupid's bow and the centre of your chin. You will also want to apply this matte colour on the tops of your cheekbones from the corner of your eye to your pupils to meet up with the shimmery shade. Take a clean fluffy brush and blend all contouring and highlighting. You should not see any lines, this is to look like natural highlights and shadows.
Blush
 Too many times I see wrongly applied blush and hear people give such poor advice on how to apply blush. I will tell you how to apply blush the proper and most flattering way! DO NOT SMILE to apply your blush- doing so will cause you to apply your blush too low! When you smile you raise your cheeks so your application falls when your smile does! Instead, follow these tips to find the perfect spot to apply blush on your face! Make a kissing face rather than a smile if you need to find your apples. You can also draw an imaginary line from the corner of your nose (right in the crease beside your nostril) to the top of your ear. On this line directly below your pupil is where you want to start applying your blush, from there all the way back into your hairline. This should be right in the middle of the highlighter and contour shade. Do not allow the colour to go any closer than this to the centre of your face, doing so will make you look years older and blush is meant to mimic a natural youthful glow! Be sure to blend all of these steps together we don't want stripes!
Have fun shaping and sculpting! You are beautiful!
Contouring (Sculpting)
As you can see in the photo, I have indicated the main areas to contour but I will also explain a couple of other areas to sculpt that will further enhance your look!
You can contour with a powder, cream base, dark foundation, concealer stick or some bronzing powders as long as you follow these simple rules; the shade must be 4-6 shades darker than your skin tone and the formula must be matte! I am really liking the Coastal Scents Blush & Contour Palette.

If you wish to thin your nose you can apply the contour shade to the sides of your nose. Blend very well! You can also shorten the appearance of your nose by applying it to the tip of your nose.
If you have a round face you may wish to define your jawline. Apply the shade on the jawline and just under the bones. You will want to avoid this step if you have a thin face or a very structured jawline as this can come off looking quite masculine to those face shapes.
Be sure to blend all of your contouring really well using circular motions with your brush.
Highlighting (shaping)
Highlighting will enhance your look by drawing the eyes to the higher planes of your face. You can also use techniques to straighten your nose. I absolutely love the Cream Colour Base in "Hush" by MAC. It has a beautiful shimmer that catches the light and is so gorgeous! You will also need a matte highlighter if you want to do a complete sculpt and shape. In the photo I have marked the areas to highlight with a shimmery highlighter. I will explain where you can apply the matte highlighter to fully shape your face.

Blush

Have fun shaping and sculpting! You are beautiful!
Thursday, March 31, 2011
How to Paint Your Nails Like a Pro
So many times I see women beautifully dressed with their hair and makeup just right and no nail polish or completely unkempt nails. 20 minutes of attention once a week is all it takes to keep your hands beautifully manicured and your look complete! Having your hands and nails in shape not only looks beautiful but it boosts your confidence too! I have put together some steps to "Polish Like a Pro" and save a small fortune by doing it all yourself!
Step 1- Preparing your nails
 Start by removing any old polish with a cotton ball and non-acetone remover. Wash your hands afterward so there is no remover remaining on your nails. Use a cuticle remover, I personally love the Sally Hansen Instant Cuticle Remover. Either clip away or push back your cuticles (whatever your preference). Next file your nails with an emery board in one direction, do not go back and forth like a saw! This season the "squoval" shape is in (square/oval). Use a buffing block to buff away any rough bits along the edges and then buff out any ridges on your nails. Now you are ready to paint!

Step 2- Paint
It is very important to use a good base coat especially if you tend to wear dark colours. A base coat will prevent the polish from staining your nails. Apply a thin base coat and allow it to completely dry. Next take the bottle of polish you have chosen and roll it between your hands. Rolling it will warm the product and mix it. Do not shake the bottle as it may cause air bubbles to form and it will affect your finish. Open the bottle and gently swipe one side of the brush along the inside lip of the bottle. Start by placing the brush about 1mm away from the cuticle and brushing straight down the middle of the nail in one stroke. DO NOT use small strokes or start a brush stroke at the tip or middle of the nail. TIP: Let the brush do the work. The next stroke will be slightly off centre. Apply a little pressure so the brush fans out as you brush from cuticle to tip and this will make the brush reach to the edges of your nail perfectly! Do the other side the same way. That's it! Only 3 strokes. Don't worry if it's thin and the coverage is inconsistent, the second coat will fix everything. Finish all ten nails this way then go ahead and do the second coat right away the exact same way you did the first coat. Allow your nails to dry fully. It will take about a half hour, so watch TV or read a magazine.....just do not touch your nails! Once your nails are completely dry you will want to apply a top coat. TIP: After a half an hour tap 2 nails together (polish to polish), if they feel tacky then wait a little longer, this will not affect the finish. The top coat will seal everything, fill in any unevenness and make your colour last longer.
Step 3- Clean up/Finish up
Once your top coat is completely dry use a cotton swab dipped in polish remover (squeeze out the excess) to clean up any mistakes along the edges. Apply your favourite hand cream to soften your hands and complete your beautifully manicured look!
Step 1- Preparing your nails
Step 2- Paint
It is very important to use a good base coat especially if you tend to wear dark colours. A base coat will prevent the polish from staining your nails. Apply a thin base coat and allow it to completely dry. Next take the bottle of polish you have chosen and roll it between your hands. Rolling it will warm the product and mix it. Do not shake the bottle as it may cause air bubbles to form and it will affect your finish. Open the bottle and gently swipe one side of the brush along the inside lip of the bottle. Start by placing the brush about 1mm away from the cuticle and brushing straight down the middle of the nail in one stroke. DO NOT use small strokes or start a brush stroke at the tip or middle of the nail. TIP: Let the brush do the work. The next stroke will be slightly off centre. Apply a little pressure so the brush fans out as you brush from cuticle to tip and this will make the brush reach to the edges of your nail perfectly! Do the other side the same way. That's it! Only 3 strokes. Don't worry if it's thin and the coverage is inconsistent, the second coat will fix everything. Finish all ten nails this way then go ahead and do the second coat right away the exact same way you did the first coat. Allow your nails to dry fully. It will take about a half hour, so watch TV or read a magazine.....just do not touch your nails! Once your nails are completely dry you will want to apply a top coat. TIP: After a half an hour tap 2 nails together (polish to polish), if they feel tacky then wait a little longer, this will not affect the finish. The top coat will seal everything, fill in any unevenness and make your colour last longer.
Step 3- Clean up/Finish up
Once your top coat is completely dry use a cotton swab dipped in polish remover (squeeze out the excess) to clean up any mistakes along the edges. Apply your favourite hand cream to soften your hands and complete your beautifully manicured look!
Monday, March 28, 2011
LUSH Haul!!!!!

Today I went to LUSH with my Luscious Ladies! Actually we are the "Hood Mamas" (Mothers from the neighbourhood!), that's what we like to call ourselves- I know we're nuts! Anywho, I'm so excited to have stocked up on LUSH goodies!

I'm writing this following a soak in the tub with the "Blue Skies and Fluffy White Clouds" Bubble Bar. It is an earthy scent with frankincense and patchouli. I admit that it doesn't smell the best concentrated in the bar, but the lingering scent after the bath is lovely! I use about a quarter of the bar for my standard size tub.
 I also got the "Creamy Candy" Bubble Bar. This one smells so yummy and creates so many bubbles!!! It's a less relaxing scent, but it leaves your skin so soft and sweet smelling!
I got one "Happy Blooming" Bath melt, described as a cheery cherry bath melt. This smells amazing (if you love sweet cherries)! It melts in the warm bath and leaves you soaking in all sorts of essential oils. I find this one quite moisturizing. I usually try to half or quarter everything from LUSH to make it last but I find with the bath melts that the full pie shaped segment is perfect. I tried less and it just didn't leave my skin as soft. I felt as if I wasted that amount as I didn't get the result I wanted, so keep that in mind!

The above are products I have tried before and obviously repurchased! The next group I have not tried. I am anxious to get soaking! I purchased 2 Think Pink Bath Bombs, one for me and one for a friend. They were just too cute to pass up! I also bought a massage bar and a "Dorothy" rainbow Bubble Bar. The Bubble Bar is for my daughter, I just knew she'd love the rainbow and fun colours! The massage bar is for my husband (to use on me)! I got a vanilla scented one. You just hold in in your hands and the warmth of your hand melts the bar slightly leaving the oils on your fingers-ready to give a massage!


Oh! I almost forgot! I also picked up the Mask of Magnaminty Face Mask. I heard great things about this mask and I am anxious to try it. This mask claims to pull dirt from your pores, exfoliate and polish the skin. I will let you know what I think of it once I use it a few times!

Subscribe to:
Posts (Atom)